How to Install WordPress Using CWPanel
Follow the steps below to install WordPress via Softaculous in your CWPanel:
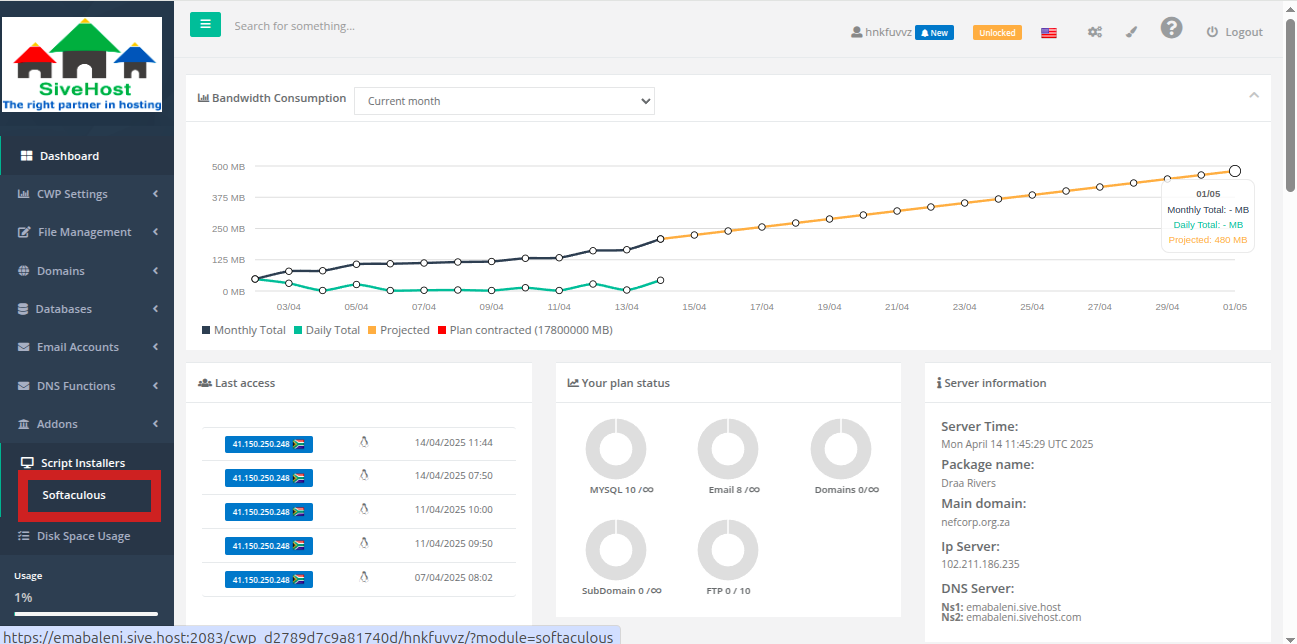
Step 1: Log into CWPanel
-
Start by logging into your CWPanel.
Step 2: Access Softaculous Installer
-
On the left-hand side menu, click on Script Installers.
-
Then, select Softaculous.
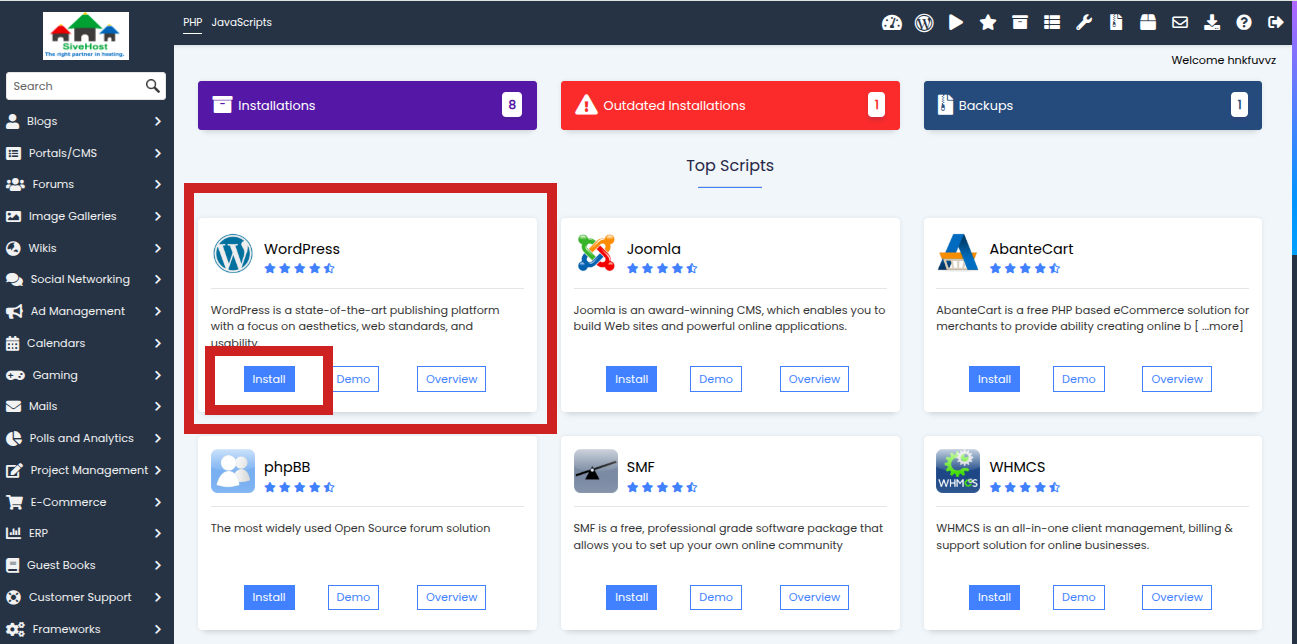
Step 3: Select WordPress
-
On the Softaculous page, locate WordPress.
-
Click Install under the WordPress icon.
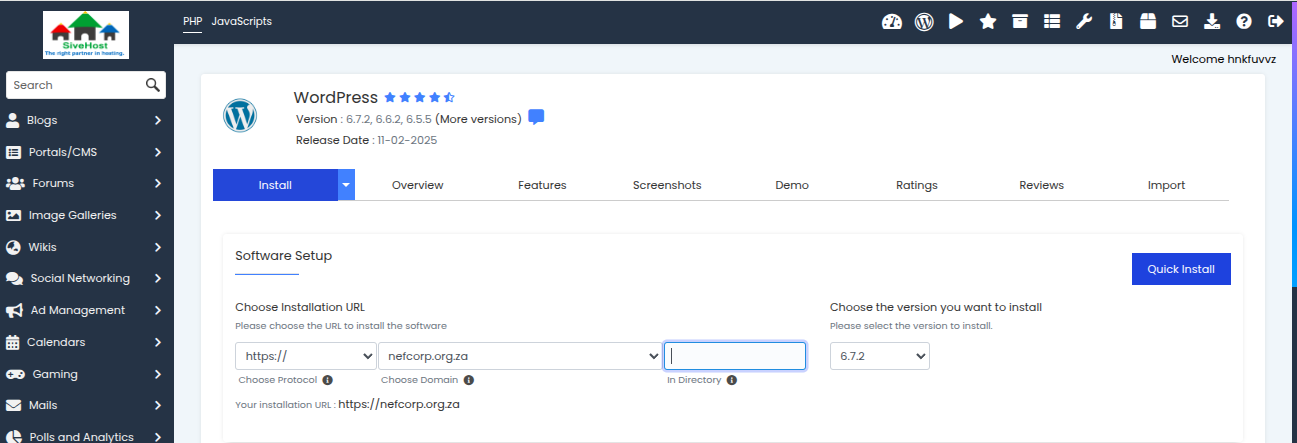
Step 4: Configure Software Setup
Under the Software Setup section:
-
Choose Protocol: Select
https://(recommended). -
Choose Domain: Click the dropdown and select your desired domain.
If you have multiple domains, choose the one you want WordPress installed on.
-
In Directory: Leave this field blank to install WordPress in the root directory (e.g., yourdomain.com), or enter a subdirectory (e.g.,
blog) if desired.
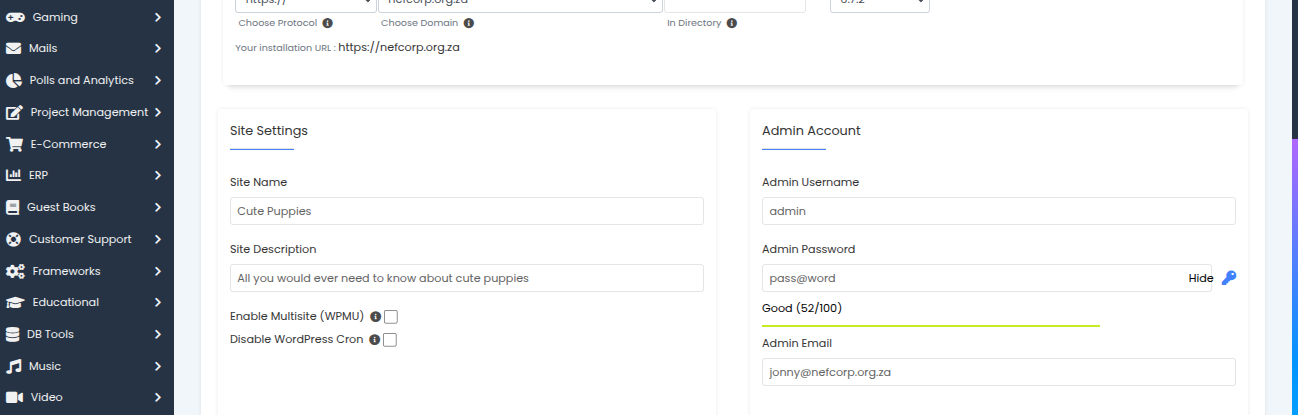
Step 5: Set Up Your Website Details
Site Settings:
-
Site Name: Enter your website’s name (e.g., My Business Site).
-
Site Description: Enter a short description or tagline for your site.
Admin Account:
-
Admin Username: Choose a unique username for your WordPress admin.
-
Admin Password: Create a strong password.
-
Admin Email: Enter a valid email address for admin notifications and password recovery.
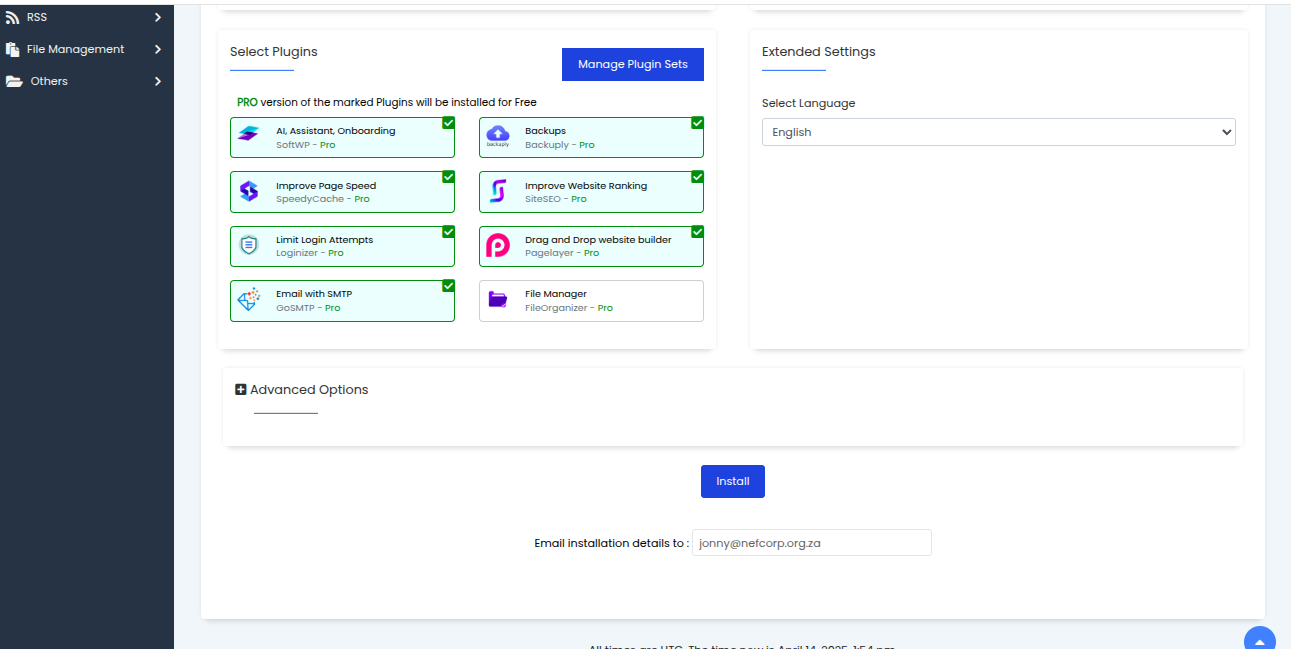
Step 6: Finalize Installation
-
Scroll down to the bottom of the page.
-
Enter your email address in the Email Installation Details To field (optional but recommended).
-
Click the Install button.
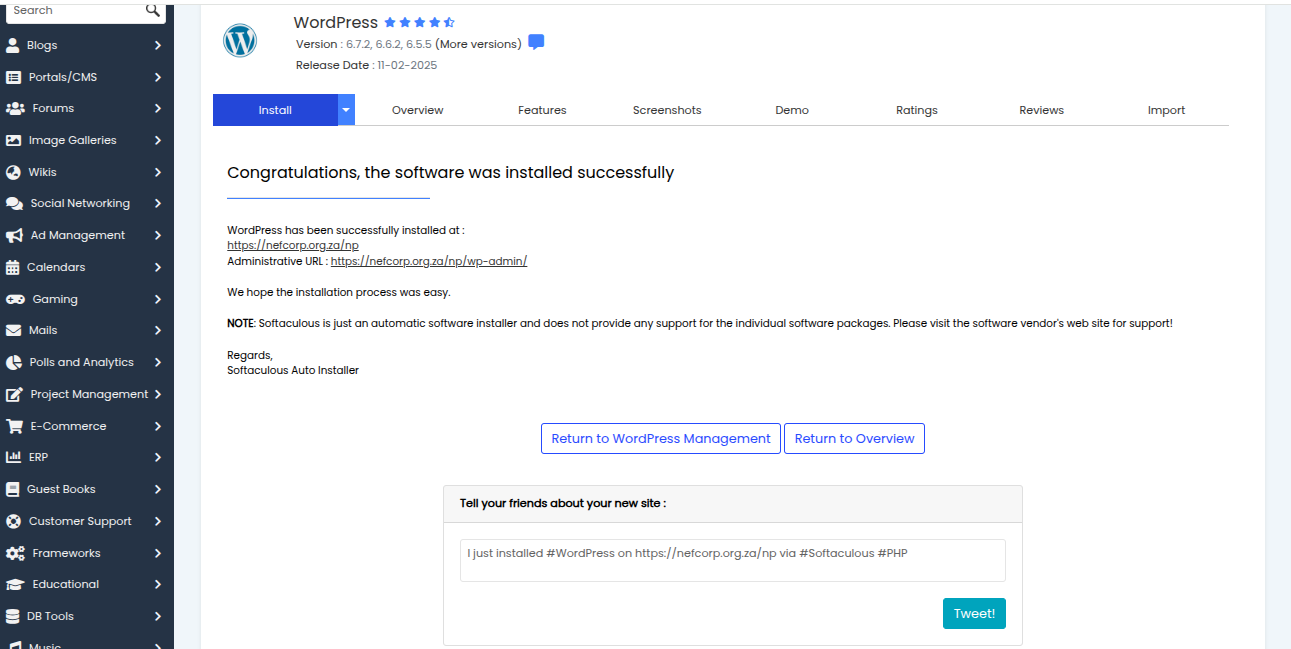
Step 7: Wait for Installation to Complete
-
The installer will take a few seconds to set everything up.
-
Once complete, you’ll be redirected to a confirmation page.
Step 8: Access Your WordPress Site
-
You’ll see two URLs:
-
One for your website (e.g.,
https://yourdomain.com) -
One for your WordPress admin login (e.g.,
https://yourdomain.com/wp-admin)
-
Use your admin credentials to log into your WordPress dashboard and start building your site!